Switch from the 3D Grid Module to the Map Module
Select Map->MODFLOW
Confirm that ALL APPLICABLE COVERAGES is SELECTED
OK
Now that we have the grid defined, the final steps remaining before we have a usable MODFLOW model is definition of the layer elevations and the starting heads.
If you have a data set (x,y,z scatter data) defining a surface, then this is the best way to enter elevations.
Sometimes we work with two data sets, for example a digitized surface elevation and depth to the bottom of a unit in a borehole.
To expedite progress to convergence on the steady state solution we will define starting heads at a constant depth below ground surface rather than an arbitrary horizontal surface.
OPEN THE SCATTER POINT DATA DEFINING THE GROUND SURFACE
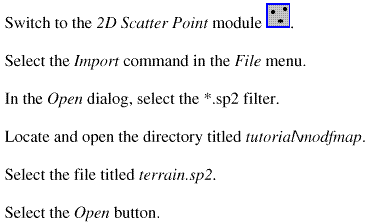
The file terrain.sp2 (*.sp2 for scatter point 2D) is a simple ascii file containing the x,y,z data defining the ground surface. You can create such data sets for your own data by using the same format. Click here to view the format of a scatter point data set
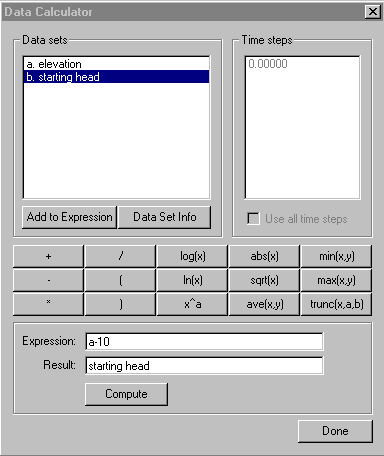
Use the DATA CALCULATOR to create a set of starting heads that are 10 ft below the ground surface using
Data>DataCalculator

INTERPOLATE HEADS AND ELEVATIONS TO THE MODFLOW GRIDS
While in the 2D Scatter Data Module
Select Interpolation->toMODFLOWLayers
- The upper left panel shows data sets that can be used.
- The upper right panel shows MODFLOW arrays that needed to be defined
- The dialog is used to associate two of these items and map the data to the array
- The lower panel shows associations that have already been made, the starting head association was made automatically because the names made the association obvious. You could unmap this if the association was incorrect.
- Only apply the starting heads to variable head cells or you will over write the heads you set for boundary conditions.
- The upper right panel shows MODFLOW arrays that needed to be defined
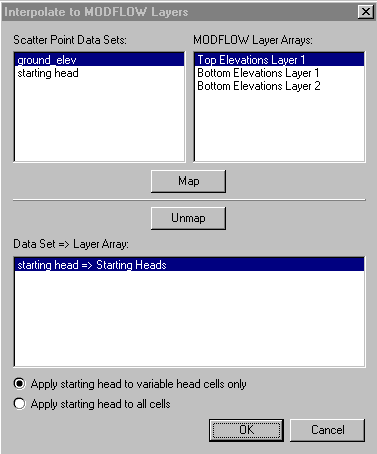
Highlight the ground elevations and the top of layer 1
Select Map
Select OK to initiate the interpolation
NOW, import the data defining the elevations of the units in boreholes by File>Import, select, elevs.sp2 open, and notice the new set of points that appear. The scatter point data for the units in boreholes is another ASCII file, much smaller then the ground surface data set. click here to view the unit elevations scatter point data set
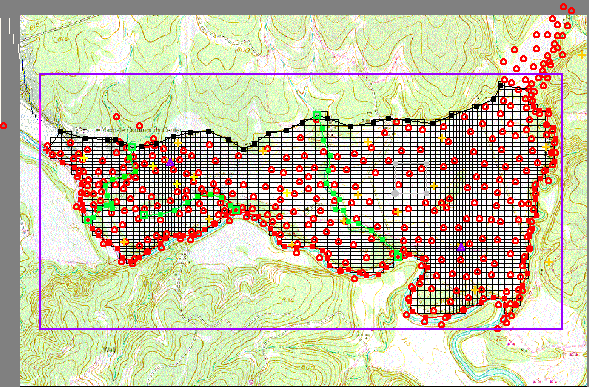
By now, your screen should look like this:
While in the 2D Scatter Data Module
Select Interpolation->toMODFLOWLayers
- notice that GMS associated the appropriate
data sets and MODFLOW arrays
- if, for some reason, the associations are not correct, then correct them, otherwise
- if, for some reason, the associations are not correct, then correct them, otherwise
Now clean up the display by hiding the scatter data points

and by hiding the grid frame

Now check the model cross section:

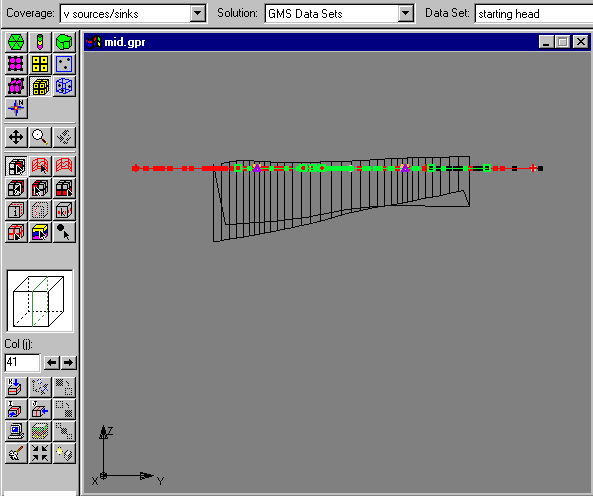
Notice that you can switch to various orientations and toggle through rows, columns and layers in the tool palette. Try to digest what you are viewing. Notice the various symbols representing the sources and sinks. Look at the layer relationships. Notice that toward the limestone hillside, where the lower sediment pinch out, the bottom elevations are above the top elevations for layer 2, so the layer looks like it is "turned inside out".
Correct these problems by:

make all cells that fall below the bottom layer inactive by:

also view the correction from the plan view perspective:

notice the inactive cells in layer 2 and return to viewing layer 1.
REVISIT THE MODEL CHECKER ONCE MORE TO CONSIDER OTHER ERRORS
If there are no errors, close the dialog
If there are errors, highlight the error you want to work on and follow the steps in the lower panel. The model checker window can be left open while you make the corrections.
Select DONE