EENG 393
Lab 6 - uSupply Schematic
InLab 6
Some self-guided
activities.
Lab 6 assignment
Each student is to complete this assignment on their own.
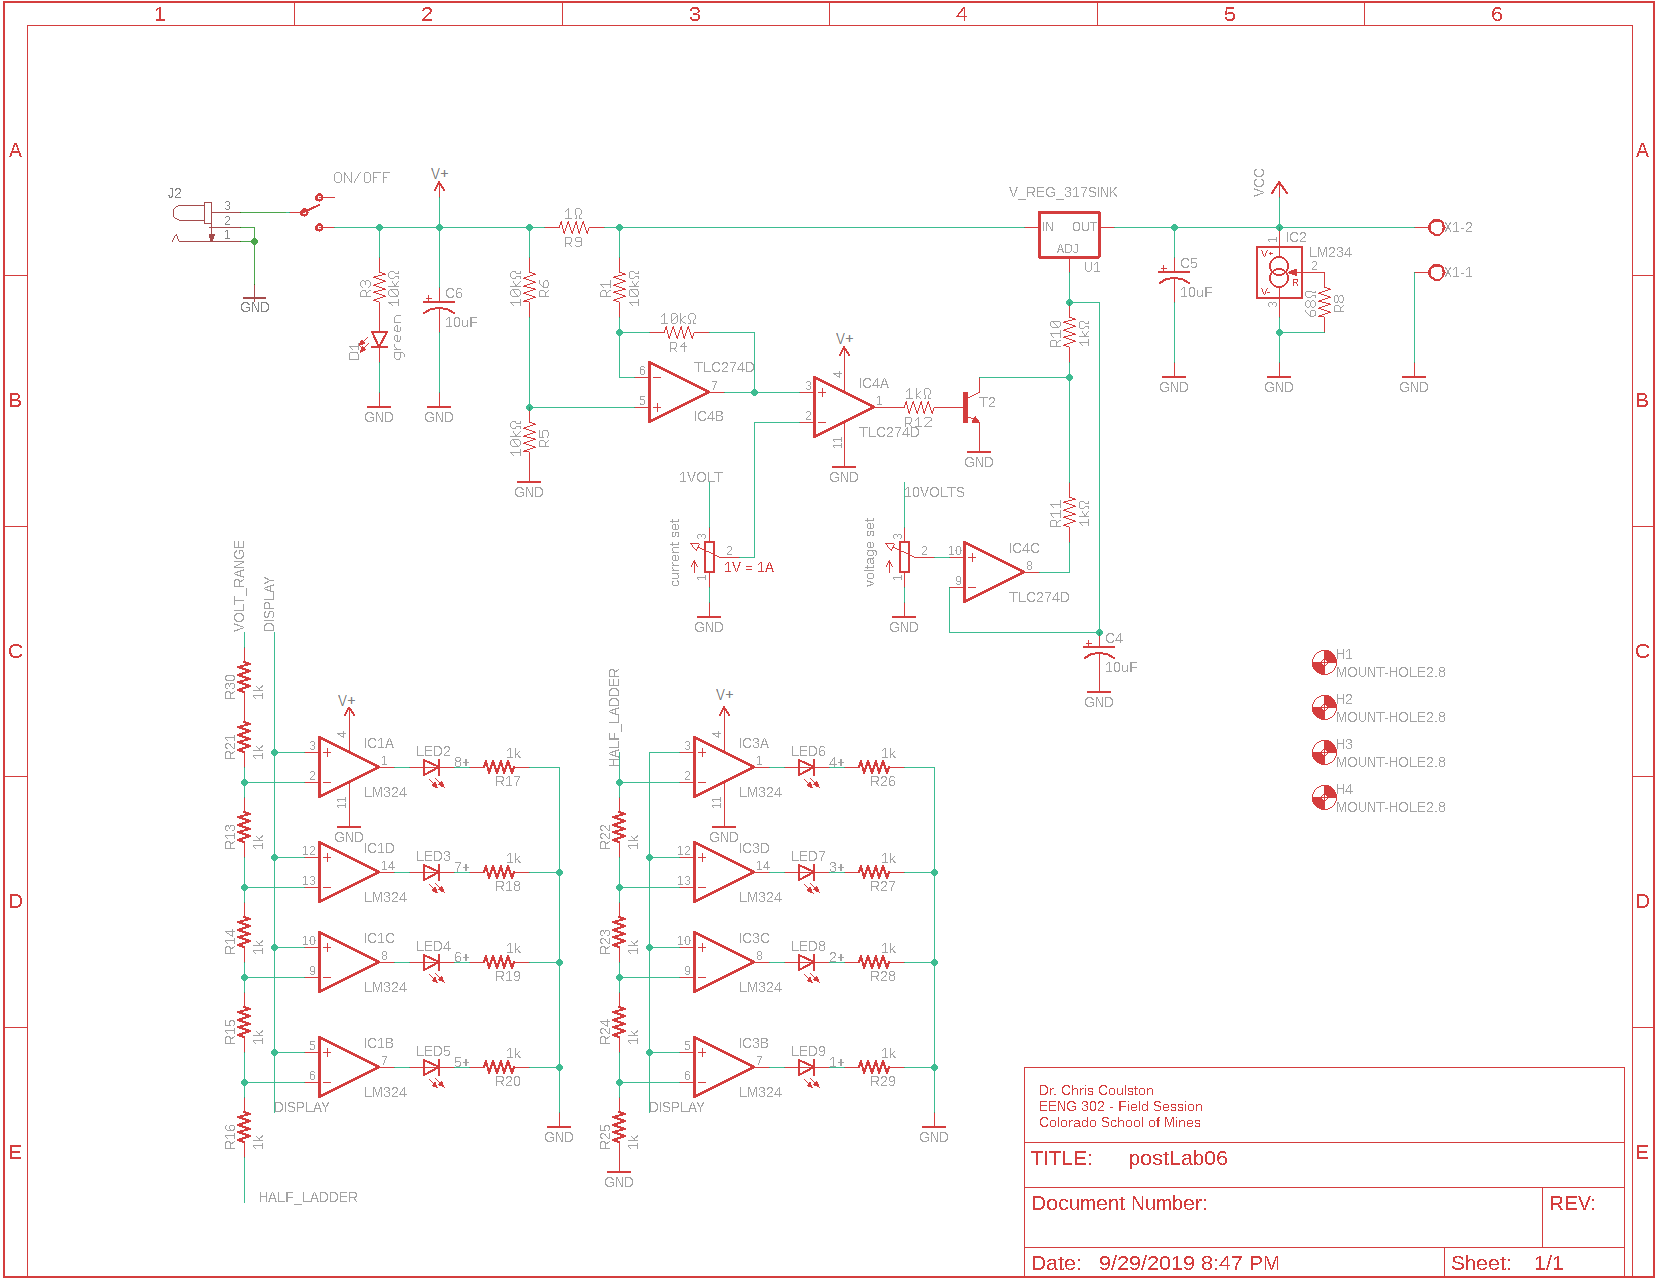
Complete the schematic of your power supply so that it looks similar
to the image shown below. To do this you will need to add the following
parts. I know that some of the parts are incorrect, you will be replacing
them in the next lab when you lern how to create custom parts.
| Part
| Search
| Library
| Folder
| Name
| Description
|
| 1 ohm resistor | | rcl | R-US_ | 0411/15
|
|
| BJT | *2N2222* | SparkFun-DiscreteSemi | TRANS_NPN
| TRANS_NPN-MMBTA42 | SOT23-3
|
| VU meter opamp | *LM324* | Linear | LM324 | SO14
|
|
| output connector | *screw* | con-wago-500 | | W237-102
| W237-102
|
| Mounting hole | | hole | MOUNT-HOLE | MOUNT-HOLE2.8
|
|
You will need to name the following nets:
- HALF_LADDER
- VOLT_RANGE (not connected to anything - yet)
- DISPLAY (not connected to anything - yet)
- 1VOLT (not connected to anything - yet)
- 10VOLT (not connected to anything - yet)
Turn-in
Export your schematic to a PDF file in EAGLE and upload the resulting
file to Canvas. To do this follow these steps from your
schematic.
- File → Print,
- In the Print pop-up,
- Printer: Microsoft Print to PDF
- Orientation: <whatever best accommodates the
layout>
- Alignment: Center
- Area: Full
- Scale factor: <bigget possible to fit a
single page>
- Click OK,
- In the "Save Print Output As" pop-up, navigate to your project
directory and give your file a meaningful name.